Photograms
What is a photogram?
A photogram is an image produced by exposing light sensitive paper to white light to turn it dark. You can place objects on the paper to obstruct the light from hitting the paper and creating white shapes contrasting the black paper. It is a way of creating a photo without a negative or a camera.
What is a darkroom?
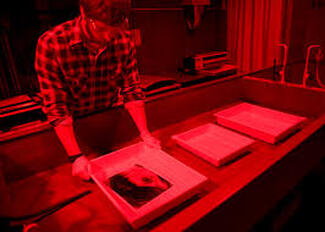
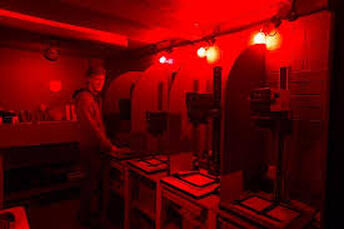
A darkroom is a room which is only lit with red light. This is because photographic paper and negatives do not react to red light so they can be handled in the darkroom. Enlargers in the room can create a small amount of white light which you can place the paper under when you want to create an image, after you have done this you can place the paper into the chemicals in the room. There is developer, stop and fix which each have a bath and once you have put the paper into each of the tubs, it is put into a sink of water, and then can be taken out of the darkroom as it can be exposed to white light. To test your developer and fixer chemicals you would get a small container of each chemical and place i piece of film in the liquids. If your developer is working, the film will develop and go black, if not your chemicals are not working. For the fixer, the film would turn transparent. How do you check the chemicals?
A photogram is an image produced by exposing light sensitive paper to white light to turn it dark. You can place objects on the paper to obstruct the light from hitting the paper and creating white shapes contrasting the black paper. It is a way of creating a photo without a negative or a camera.
What is a darkroom?
A darkroom is a room which is only lit with red light. This is because photographic paper and negatives do not react to red light so they can be handled in the darkroom. Enlargers in the room can create a small amount of white light which you can place the paper under when you want to create an image, after you have done this you can place the paper into the chemicals in the room. There is developer, stop and fix which each have a bath and once you have put the paper into each of the tubs, it is put into a sink of water, and then can be taken out of the darkroom as it can be exposed to white light. To test your developer and fixer chemicals you would get a small container of each chemical and place i piece of film in the liquids. If your developer is working, the film will develop and go black, if not your chemicals are not working. For the fixer, the film would turn transparent. How do you check the chemicals?
|
|
|
Aperture test
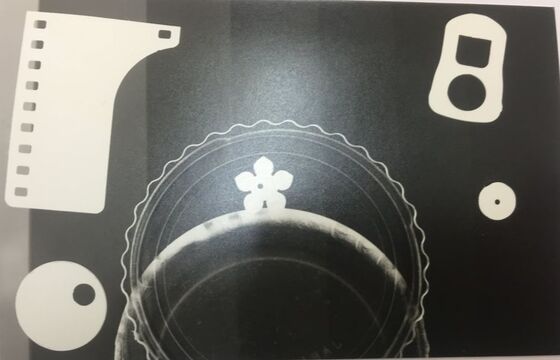
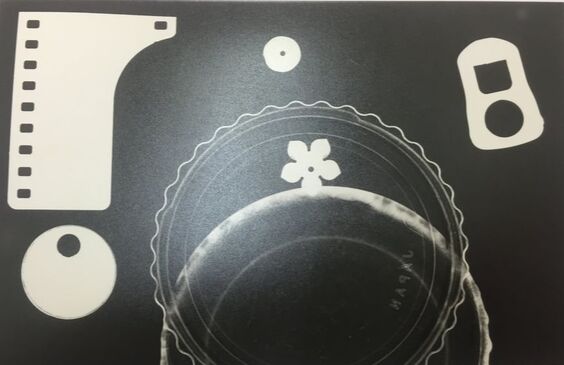
This is my aperture test for my photograms. I was using the same objects and putting them in roughly the same places for each photogram as well as the exposure time, however each time i made one i would lower the aperture by one stop. The aperture is the opening in your lens in which the light travels through the camera. The different sizes of the opening can be changed to let more light into the camera, measured by f-stop. I started with the highest F-stop, F16, which made the contrast low as the back is grey not black. Though this did make the objects more defined which made the plastic container look good as you can see all the details. As the F-stop gets lower, the photos become more contrasted but the objects are less defined like in the F4 photogram the plastic container is barely visible and the other items are slightly faded on the edges.
Explain Aperture test
Explain Aperture test
F16 2 seconds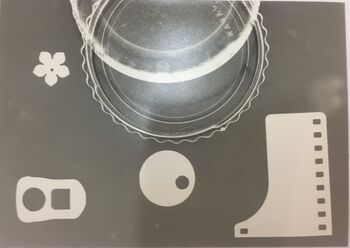
|
F11 2 seconds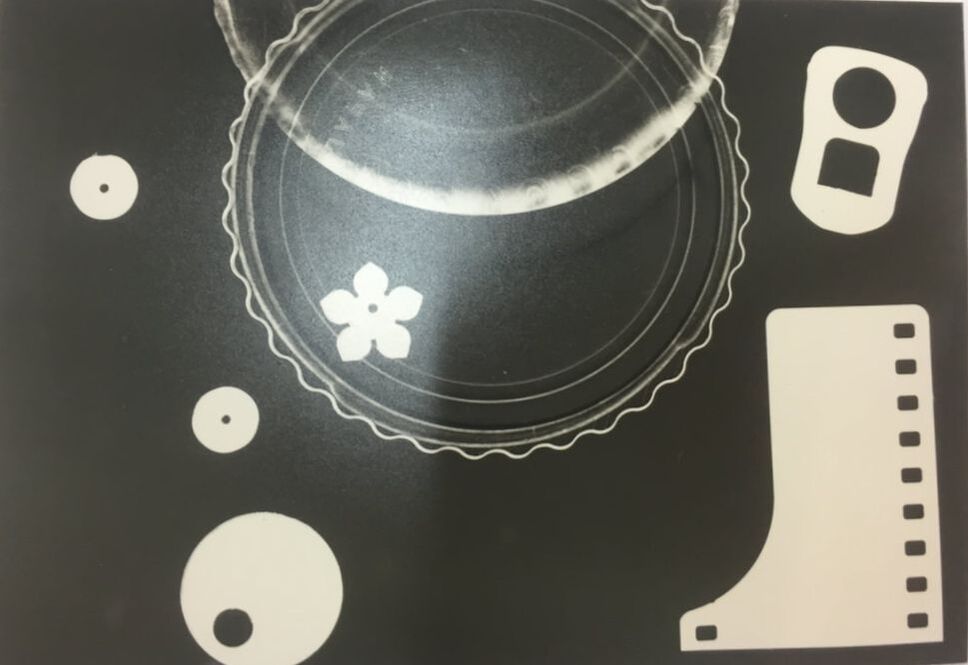
|
F8 2 seconds
|
F5.6 2 seconds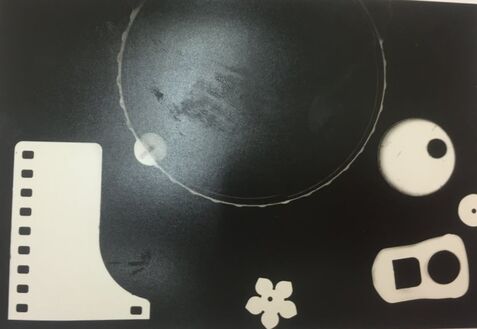
|
F4 2 seconds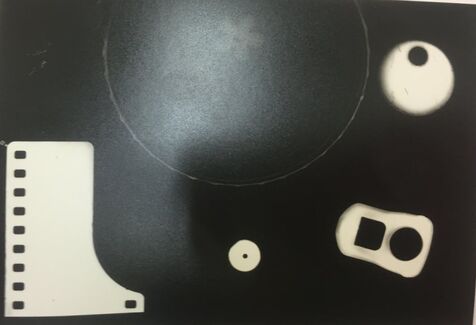
|
Test Strip
In this test we didn't change the aperture but changed the exposure time. It's also different because the whole test is done on one piece of paper. This is to make it easier as we do this before making most photos. I kept the aperture on F11 and the exposure was 0.5 seconds each time. To make the different gaps i placed my paper and objects like normal but before exposing the photo like normal, i covered most of the paper with black card. Then i exposed it and moved the card slightly down the paper exposing each time you move it. Once you develop it, it will look like this where the first portion has been exposed 7 times and the last only once. This means you can clearly see what each exposure time will do and you can choose the best looking one.
Explain the test strip process, reading it and making the print.
Explain the test strip process, reading it and making the print.
0.5 1 1.5 2 2.5 3 3.5
F11 2.5 seconds Final Version
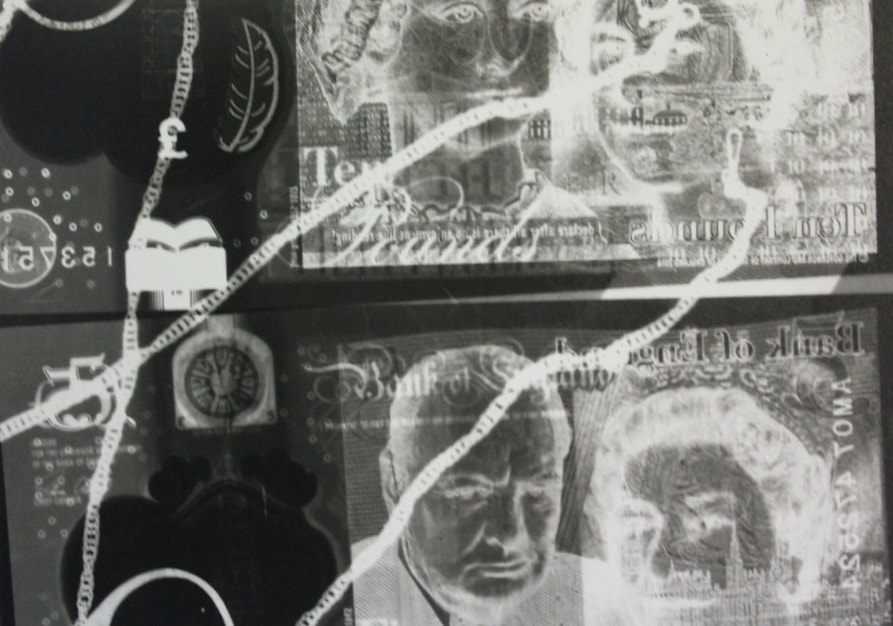
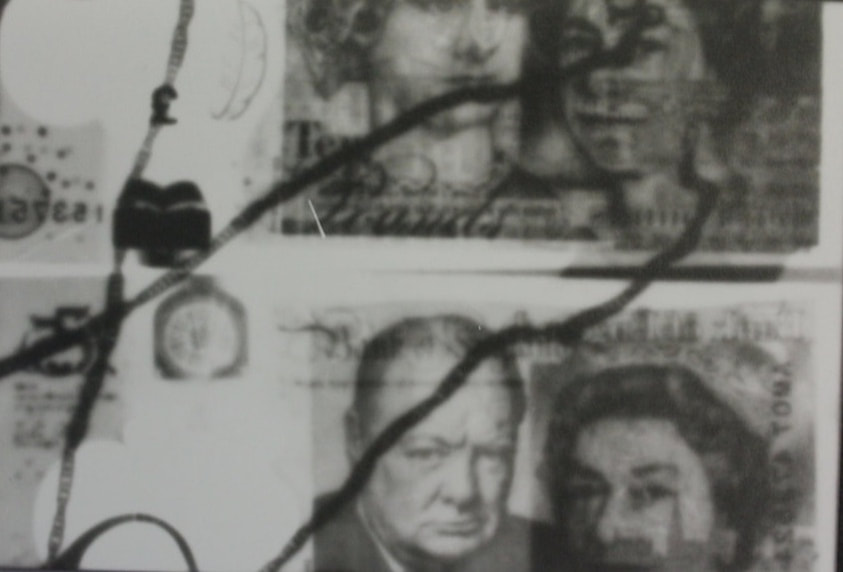
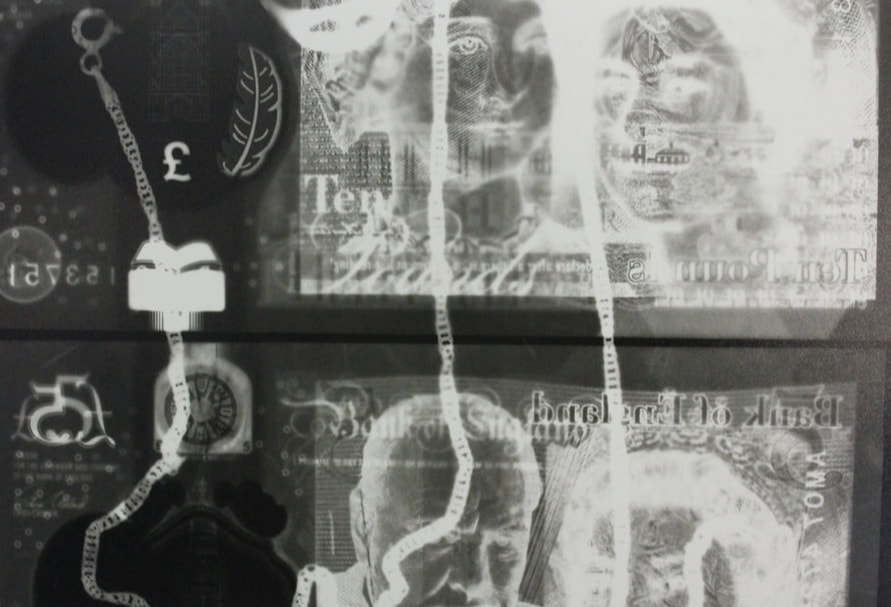
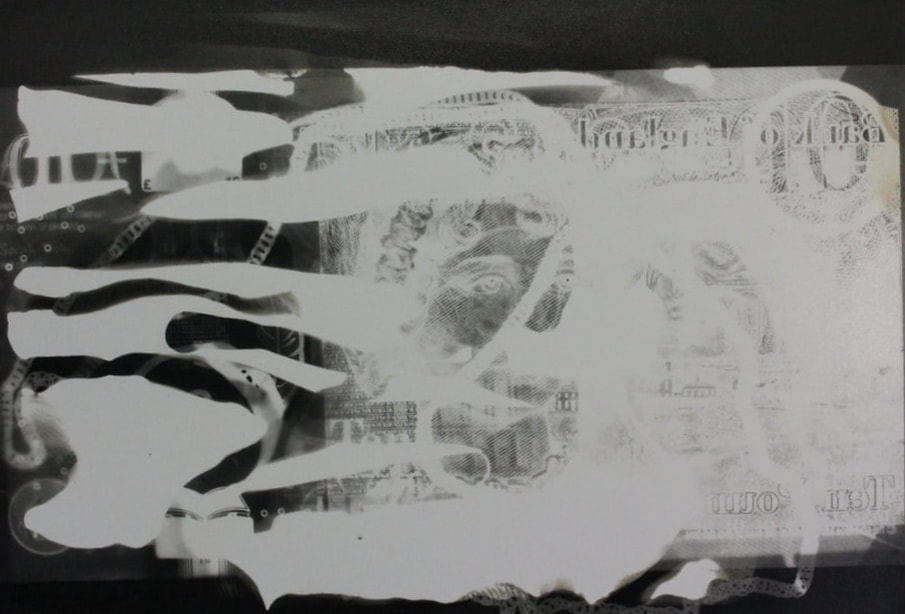
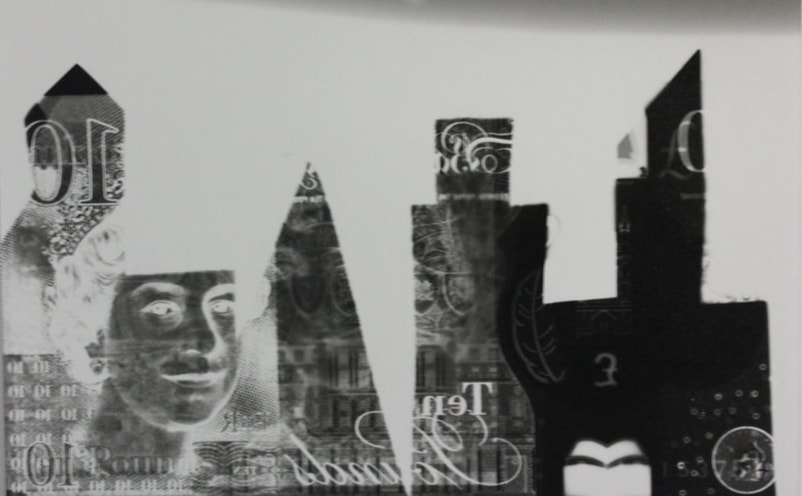
Themed Photograms
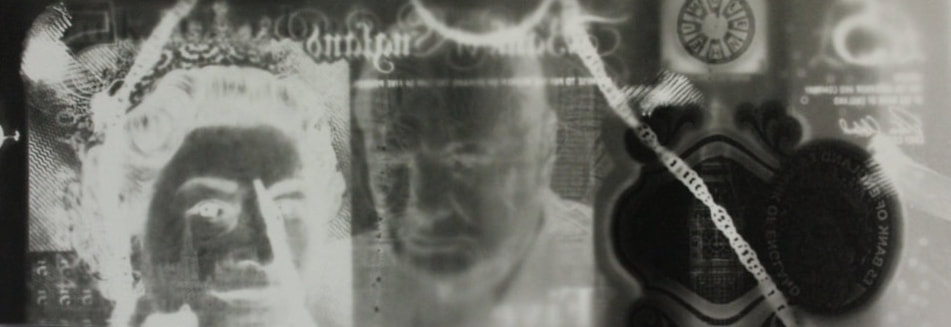
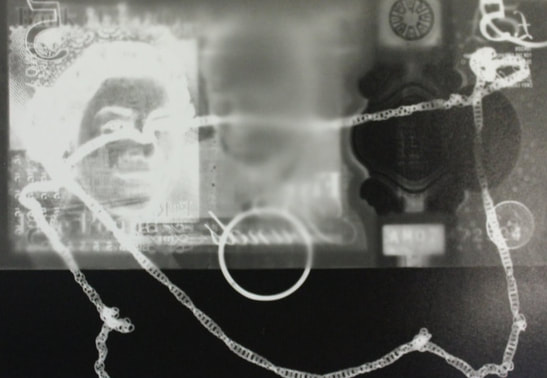
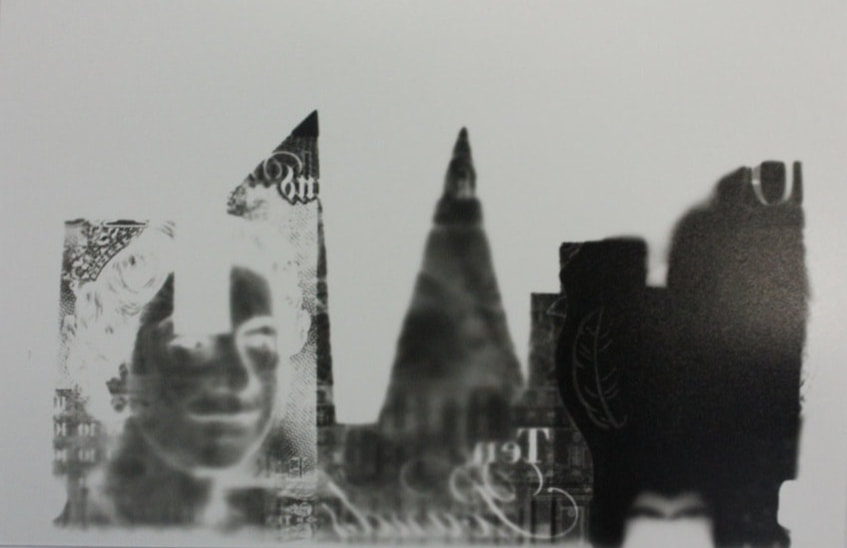
These are my themed photograms based on money and jewellery. I though that the £5 note would be interesting to try because of the detailed images and because it's double sided. It was difficult to work with because parts of the note let more light in than others, but I think it was worth it because the money looks really good. One of the different processes shown is the sandwich print. This required me to make a normal photogram with my objects and then use that to invert the image to a positive. I did this by placing a new piece of photographic paper underneath the original photogram, then I put a sheet of glass over the two papers to flatten them. Then I set the enlarger to F16, 2 seconds and exposed it and developed it like normal. This process gives you an inverted print but is slightly more fuzzy than the original. Another process is the stencil print which is when you expose your photo with objects like normal but only expose it for half the time. Then you would expose it again on the same exposure time but with a paper stencil of you choice over the image, and develop it like normal. However, my object is flat so I was able to just put the note under the stencil and expose it once. I think this worked and looks good in the bottom picture. Another process I had to use was the dodge and burn. This is because the note has as see-through part which makes it very dark but on the other side it is much lighter. The dodge and burn was a way of evening it out. I used a piece of black card like the test strip to cover up the see-through half for one of the exposures and then revealed it for the second exposure, making the photo much more even in shade.
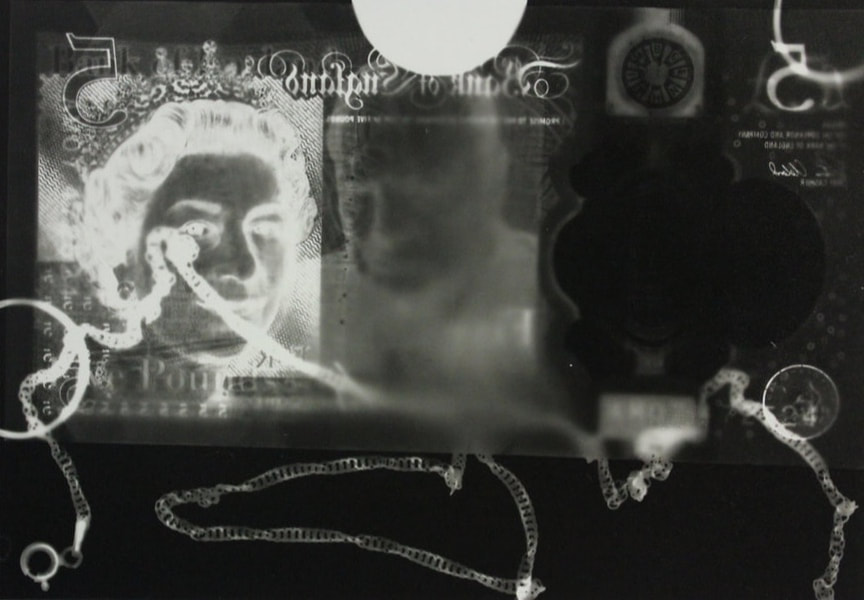
Post Production
There are also some other processes in photograms which are done after exposing the image. I have done one of these methods here, which is the paint on developer method which requires you to expose the paper like normal and then use a paint brush to paint on the developer on to your paper. This makes the photogram distorted like my one is because only some parts, where the liquid has touched the paper, becomes dark. Another post production process is cutting up the image and weaving the strips into each other, or sewing into the paper using a needle and some thread. You could also use paint or pens to colour your images after they have been developed. Explain the different processes.
Test strips

|
|
Stencil
|
Dodge and burn
|
Sandwich print
|
|
|
Paint on developer
|
Stencil
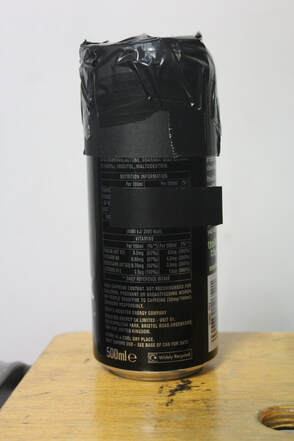
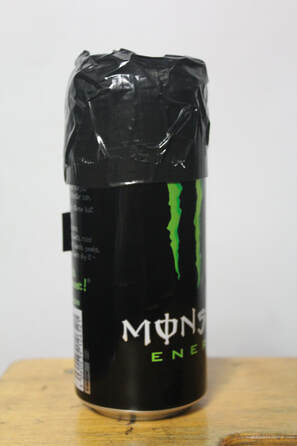
Pin hole camera
|
A pin hole camera is a way of taking pictures without using film. It doesn't have to be made out of a can but it is the easiest object to find and easiest to make. It uses the same concept as a camera obscura as the image from outside the can is projected through the hole onto the inside of the can. This means that we can put photographic paper at the back of the can because the image will be projected onto that. For this to work to work the can has to have no holes for light to leak through except the pin hole. We cut off the top of the can so we could put the paper inside and made a new lid out of card and duct tape. I made a hole in the front of the can with a pin and covered the hole with electrical tape. When you want to take a photo, you reveal the hole for a few seconds towards your subject in good daylight. The exposure is the only setting you can change and it takes a few tries to get right because of different lights. It doesn't make the most detailed photos but if you do it right, they can look good.
|
|
|
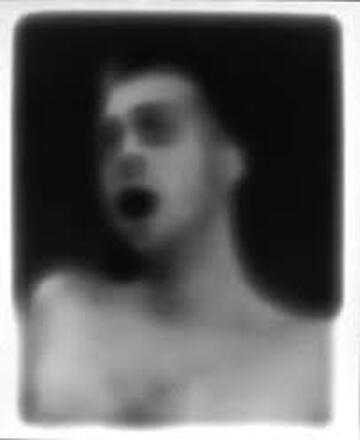
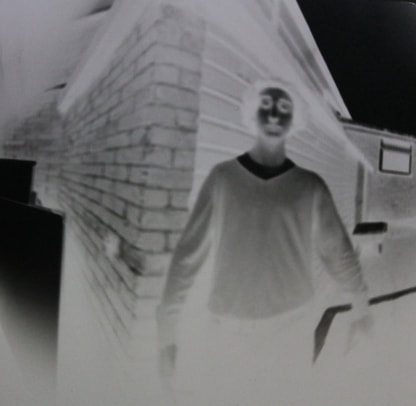
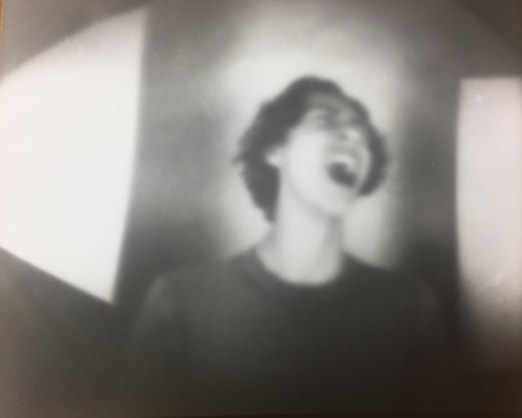
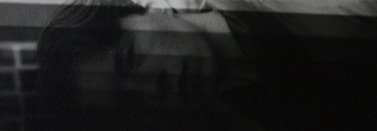
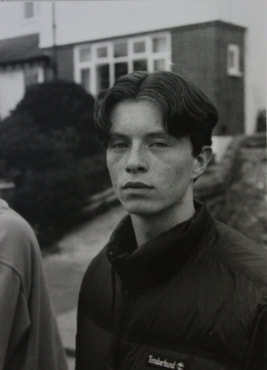
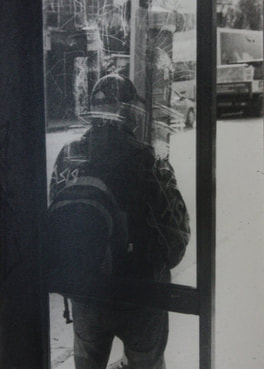
The task was to make 4 photos using the pin hole camera including a building picture, indoor portrait, outdoor portrait and double exposure. All of these pictures took a few tries to perfect but the one which took the longest was the building photo. This was because when taking a photo of the buildings you are pointing it towards the light so my photo became over exposed, but once i figured it out i got a good photo of a building. I really like how there is a zebra crossing at the bottom which has been curved because of the way the can is shaped. The sandwich print also came out okay but the process made the photo slightly more blurry. I was able to get the indoor portrait pretty quickly because we had big studio lights to light the model with. Even with the lights it still required a 20-30 second exposure, but the result was very detailed with good contrast and the sandwich print was the same. My outdoor portrait also took a very long time to work out because of the exposure time outside and also the distance from the person had to be very small. However, this was possibly my best photo because it is so detailed and you can see everything in frame. I also like how he is stood in front of a corner because the walls are stretched and the lines give an interesting effect. The double exposure print was the most complex process to do as, on top of taking a good picture, you have to expose the paper twice, with your subject moving in between. This can cause problems because when you cover the hole, you may accidentally move the can which would blur the background. The subject might also seem slightly transparent in the photo because their body was exposed for half the time while the background was also exposed for half. In my double exposure, you can see the same person sitting in two different places but i should have taken it from a shorter distance to make it more clear.
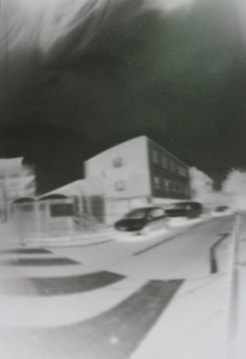
Building Picture
|
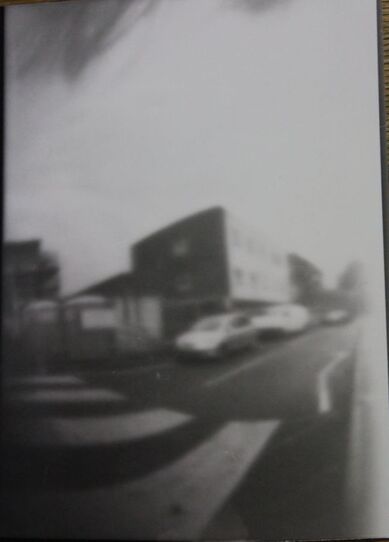
Sandwich Print
|
Double Exposure
|
Sandwich Print
|

Indoor Portrait
|
Sandwich Print

|
|
Outdoor Portrait
|
Sandwich Print
|
SLR Camera
|
A Single Lens Reflex is a camera that typically uses a mirror and prism system that permits the photographer to view through the lens and see what will be photographed. With twin lens reflex and rangefinder cameras, the viewed image could be significantly different from the final image. When the shutter button is pressed on most SLRs, the mirror flips out of the light path, allowing light to pass through to the light receptor and the image to be captured. A DSLR is a Digital Single Lens Reflex which takes the photos digitally and puts them on a storage system like an SD card and has a screen to immediately view the images. However, the SLR takes photos onto film which is developed later and cannot be viewed until then.
|

|
In the lesson, we learned how to load film into the SLR cameras and how to use them. After we had learned this, we went out to take photos and experiment with the settings like aperture and Sutter exposure. We did this by taking 3 different photos of the same person and changing just the aperture each time, and doing the same process with shutter speed. This is to demonstrate what each setting will do and what setting to keep in different situations. After experimenting like this, we simply took photos of things around us as we liked, and once we had taken all of our photos, we winded our film back into the canister and took it out the camera.
Developing Film
|
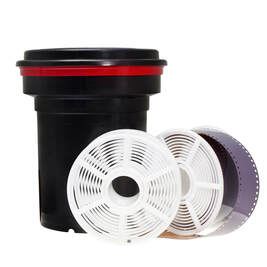
To develop film you would need a universal film tank and reel which is where you develop film in. When putting your film into the tank, you are required to be in complete darkness because as the film comes out of the canister, it is sensitive to all light, even red light. Therefore, we had to open our canisters, load the film into the reel and twist it to make the film roll all the way in and place the reel into the universal film tank all in the dark. Once your film is inside the tank, you can develop it with the developer, stop and fixer. First, you would pour in the developer and keep I in for 11 minutes, turning it upside down every minute. Then, you pour it back into the bottle of developer and pour in the stop for only 30 seconds. Finally, the stop can be poured out and the fix goes in for 5 minutes, turning it every minute. It is rinsed in water for another 5 minutes and is then taken out and dried. My first roll of film didn't work so at this point, there were no negatives on the film when there should be so I took a camera home and did the task again and it worked the second time.
|
|
Printing
|
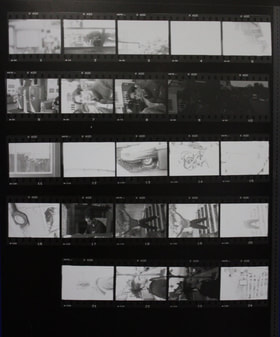
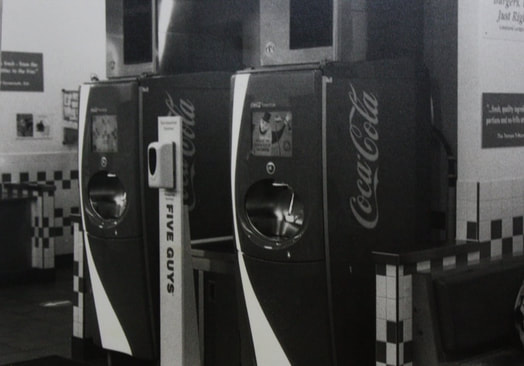
The first part of printing is creating a contact sheet. You can do this by cutting your film up into small strips and placing them into a plastic sleeve. Once you have done this, you will need to use the enlarger to print out the contact sheet. This is done by putting a large sheet of photographic paper underneath your sleeve of negatives and exposing it with a medium aperture. You would also figure out your shutter speed with a test strip before hand, I used 1.5 seconds which is not a very exposure but my photos had high exposure so it worked. The contact sheet should look like the photo on the right and it is useful because they are all in one place and can be used to refer back to the photos' exposures. Once you have made a contact sheet, you can then print out your photos which is much more difficult. First, you would slot your chosen film into the negative trey and make sure it is lined up correctly, and then place a piece of photographic paper onto the counter and, again, making sure it is lined up. Then you would expose it with the time you chose from the test strip you made before, and a medium aperture. Once this is developed it should come out as a positive photo on the paper. The images at the bottom are my photos I printed as they were my best negatives from my contact sheet. I think they all came out well with good contrast and they are interesting pictures because I was able to take a camera out of school instead of taking them in school.
|
|
|

|
|
|
|
Shutter speed
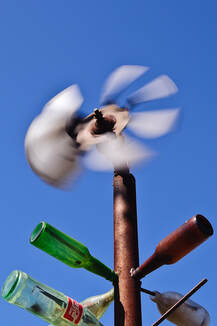
Shutter speed is one of the settings you are able to manipulate before taking a photo. It is the speed of the shutter when it opens and closes as you take a picture. The faster the shutter speed, the less exposed the photo will be because less light came through the lens, and the slower the shutter speed, the more exposed the photo will be. It is measured by the amount of time the shutter is open for, for example an average shutter speed would be 1/125, which means a 1/125th of a second. Exposure is not the only thing that shutter speed can change about the image, it also determines how blurred the photo will be. For example, a photo of a train moving past with a slow shutter speed would make the train very blurred because the train moves a lot in the time that the shutter was open. If you took the same photo of a train with fast shutter speed, the photo wouldn't be as blurry because the train did not move as much in the time that the shutter was open. This means that shutter speed can be used in creative ways. One technique i like to use is when you use a slow shutter speed and focus on something that is still while other things move around in the background. If you use a tripod, this can create an interesting effect where the foreground is still and the background is blurred. Another technique is the zoom blur, which is when you use a slow shutter speed and zoom in or out as you take the photo. Again, this would have to be done with a tripod to get the full effect. You could also use very quick shutter speed to take photos of something which usually moves very fast, or to capture something mid air.

|
|
|
Composition
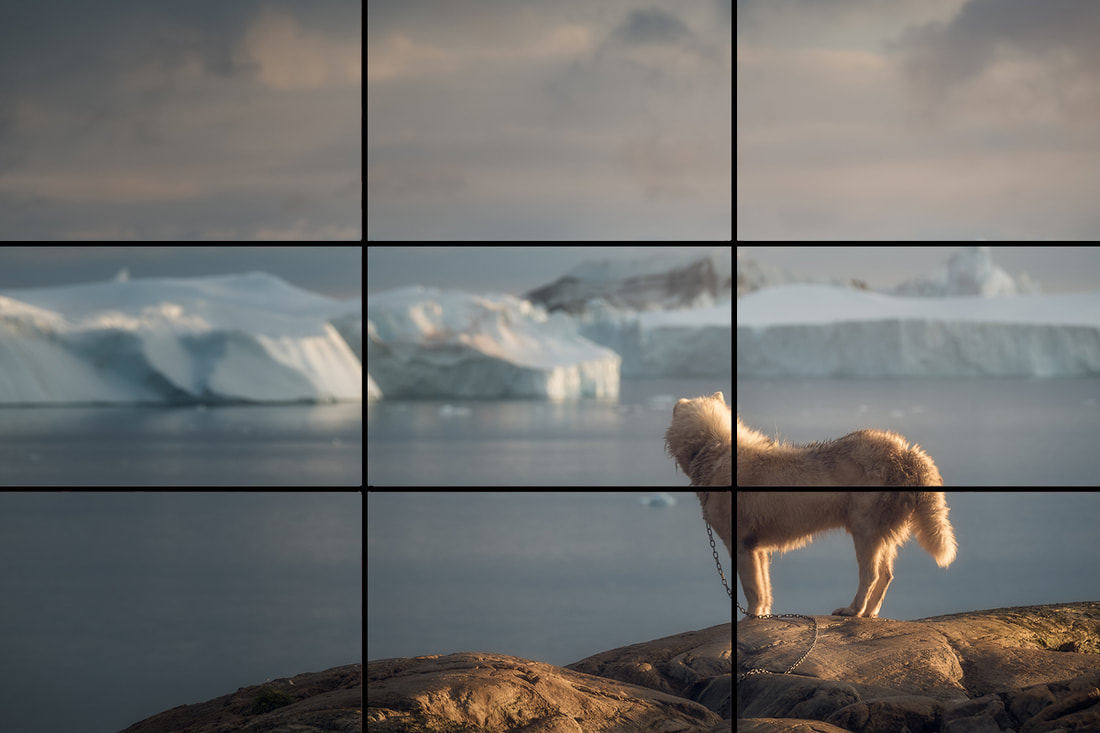
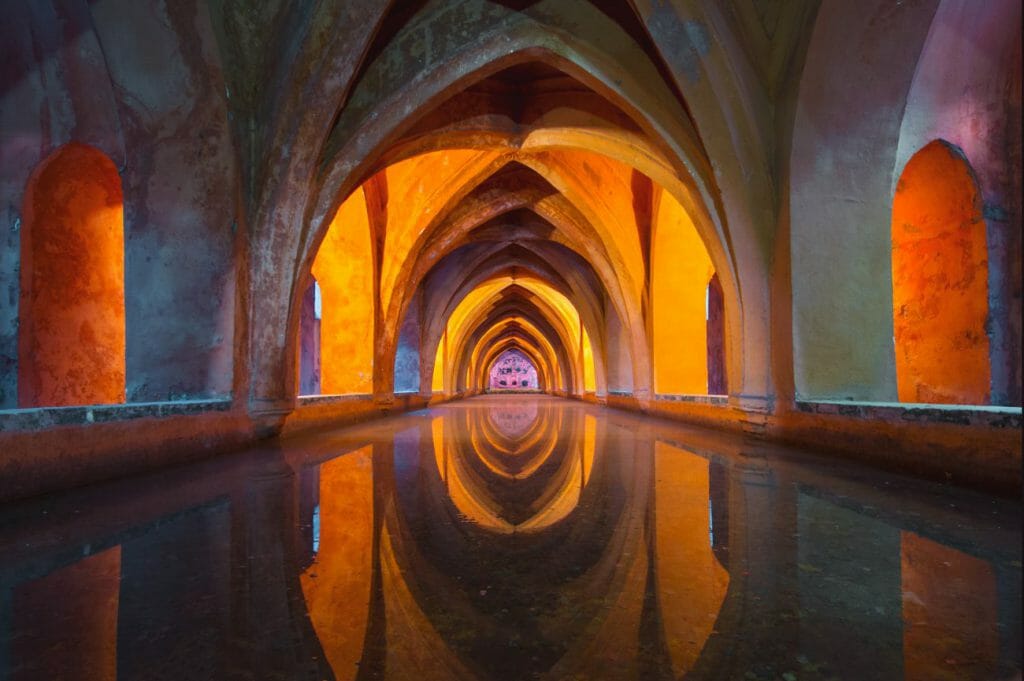
Composition is how the elements of a photo are arranged in a picture. A photographs composition is supposed to combine subjects into an aesthetically pleasing whole, it is how an artist tells a story in a single frame. The rule of thirds is a guideline for composition where there are two horizontal lines and two vertical lines. There are nine boxes and four intersection points, and if you place your most important subject on of of these points the image will look more natural like the photo on the left. You don't always have to use this rule if that is your intention in the image. A photo may look much better if you centre the subject and give it symmetry like the photo on the right, or if there are multiple subjects.
|
|
